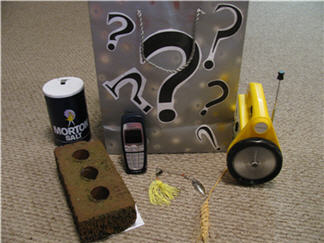
What's in the Bag?
 "What’s In The Bag?" (WITB) has become one of my
favorite activities to introduce and prepare participants for a
Bible lesson. I have used it with elementary-aged students,
teenagers, collegians and adults. It can be played (uh, I mean
administered) the same way, regardless of the age. "What’s In The Bag?" (WITB) has become one of my
favorite activities to introduce and prepare participants for a
Bible lesson. I have used it with elementary-aged students,
teenagers, collegians and adults. It can be played (uh, I mean
administered) the same way, regardless of the age.
Point of "What’s In The Bag?": To
creatively introduce the subject of your Bible study by allowing
your class participants to ask a series of questions that will
eventually reveal what you have in the bag.
Materials Needed: A gift bag. To add
an element of interest, I decorated mine with question marks of all
sizes and fonts that I printed off, cut out and glued to the bag. It
looks much like something that once belonged to the Riddler! You
could also use a box, but I just prefer the bag.
Instructions: Hide an object in the
bag that is representative of at least one point or principle of
your Bible study. Taking turns, instruct the class participants to
ask one question at a time that can be answered with only a “yes” or
“no” answer. As the questions are asked and answered, categories of
objects are eliminated. Gradually, the choices are narrowed down
until someone finally guesses what’s in the bag!
In the beginning, the best types of questions to be
asked are those that are broad in nature so that large groupings of
objects are more quickly dismissed. For example:
Is it made of wood?
Is it edible?
Is it sports related?
If your participants get bogged down in asking
questions that are too specific, such as “Is it black?” or “Is it
heavy?” you might need to remind them to broaden their questions.
Once a broad category is revealed, then it makes sense to get more
specific. For example, if it has been established that the object is
made of wood, then it would make sense for them to ask more specific
questions, such as “Is it a pencil?” In addition, at times you may
need to review the information that has already been established. If
you responded “yes” to the question, “Is it edible?” it doesn’t make
sense for the participants to ask “Is it made of metal?”
Suggestions: This isn’t an activity
I’d recommend if you have time constraints, because you never know
how quickly, or not so quickly, your participants will guess WITB. I
feel it’s best to let the activity run its course of questioning and
answering; but if you find you need to speed up the process, you
could provide hints in addition to your “yes” or “no” answer. Be
careful, though, not to reveal too much information to cause the
activity to end anti-climatically. It’s optional, too, whether to
give out a prize to the participant who guesses the object. I seldom
do this because I feel everyone had a hand in reaching the correct
answer. Plus, the point of the activity is not to win a prize.
One of the reasons I think this activity is so
successful is that it immediately involves audience participation on
a fun and entertaining level. And, it certainly beats the mundane
methodology of standing up in front of the group and saying, “Today
we’re going to study Jesus as the light of the world. Now turn in
your Bibles to….” How unexciting is that?
Once the object is guessed, you can certainly jump
right into your planned study. You’ll have your audience’s
attention. But, if appropriate, consider keeping the class
participation going by asking questions such as, what is the
object’s purpose? How is it used? Plan your questions so that the
points you want to make are revealed in the question and answer
process. In this way, you become more of a facilitator in the
learning process, rather than just a teacher. My guess is that your
participants will remember this lesson much longer than a lecture.
I’ve provided several WITB lesson ideas, and a
sample of how asking detailed questions can guide you right through
your lesson plan. (See Fishing Lure.)
What’s In The Bag?
Fishing Lure
Lesson Theme: Satan’s Tactics to Lure
Believers into Temptation
Once the fishing lure is guessed as the object in
WITB, asking further questions similar to those below will assist
you in seamlessly moving into the Bible study. The questions and
possible responses (in italics) help establish the parallels between
the fishing lure and tactics of Satan.
What is the purpose of the fishing lure?
To deceive fish, to entice them to bite into a hidden hook so that
they are hooked and caught.
Would fishermen catch any fish if they dropped an
empty hook in the water?
Not hardly.
Why not?
Because there’s nothing on the hook to entice the fish to bite it.
So why is using the lure more successful than an
empty hook?
Because the attachments hide the hook and deceive the fish into
thinking there is something good to eat.
At this point, it’s easy to transition from
discussing lures and how they are used, to pointing out the
similarities of how Satan tempts believers. His methods are the
same. He’s going to do whatever it takes to deceive us and to make
his temptations, or “lures,” look so good that we end up being
hooked.
As a further visual demonstration of this, I bring
out a large fishhook on which I place a portion of a Milky Way candy
bar, large enough to cover and mold around the hook. Satan’s tactics
of luring us with something that’s appealing, which is represented
by the candy bar, completely hide any of the consequences in store
for us when we give in to his temptations. His enticements appear
more fun and appealing than those things in our current life, so
we’re lured to take a bite. What we don’t see is the pain, the
devastation and heartbreak once we’re hooked by the devil’s schemes.
And you know what? He couldn’t care less! While God loves us and has
only our very best interests at heart, Satan has our worst. His only
desire is to see us fail and discredit our testimony.
Other References:
1 Peter 5:8-9; 1 John 2:15-17; Ephesians 6:10-17; 2 Corinthians
10:3-6; 1 Thessalonians 5:8. Also refer to:
Genesis 3:1-6
Commentary, The Great Deception.
What’s In The Bag?
Flashlight, Light Bulb or Candle
Lesson Themes:
The Lord is my light and my salvation. Psalm 27:1
Thy word is a lamp unto my feet, and a light unto my path. Psalm
119:105; Proverbs 6:23
Ye are the light of the world. Matthew 5:14-16; Ephesians 5:8-10
Men love darkness rather than light. John 3:18-21, 11:9-10
Jesus is the Light of the World. John 8:12, 9:5, 12:35-36, 46
Light of the Gospel. 2 Corinthians 4:3-6
Other References:
Romans 13:8-14; 1 Corinthians 4:5; 2 Corinthians 6:14; 1 Peter
2:9-10; 1 John 1:6-7, 2:7-11; Revelation 21:23-27, 22:5
What’s In The Bag?
Phone
Lesson Theme: Prayer
Theme Development
Ideas:
Unlike a phone, we’ll never get a busy signal when seeking God’s
audience.
The lines of communication are always open.
God will never put us on hold.
God will never hang up on us.
Conversation is two-way.
Through the conversation, a relationship is developed.
What’s In The Bag?
Brick
Lesson Themes:
Jesus, the Firm Foundation. Luke 6:46-49; 1 Corinthians 3:11
Cost of Discipleship. Luke 14:28-30
Other References:
1 Corinthians 3:9-10, 12-14. Also refer to:
Walls That Go Splat.
What’s In The Bag?
Hay/Straw
Lesson Themes:
Building upon the Foundation. 1 Corinthians 3:12-15
Once you cover the
various results of man’s building upon the foundation of Jesus
Christ (gold, silver, precious stones, wood, hay, stubble), lighting
the hay and allowing your class members to watch it burn up will
further demonstrate the testing of everyone’s works, and the type of
works we should be striving for.
What’s In The Bag?
Salt Shaker
Lesson Theme:
Ye are the salt of the earth. Matthew 5:13, Mark 9:50, Luke
14:34-35.
What’s In The Bag?
Stalk of Wheat
Lesson Theme:
Introduction to the Book of Ruth (Gleaning in the field)
Top |
Back to Object Lessons |